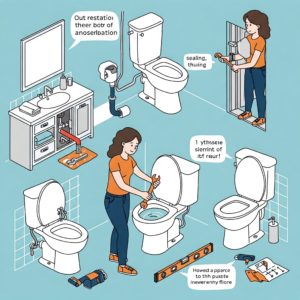
INSTALL A TOILET SEAT IN THREE STEPS
Do you want to upgrade the comfort level of your current toilet? Are you looking to enhance the aesthetic and feel of your bathroom? Installing a new toilet seat is an easy DIY project that can be installed quickly, requiring basic tools found in most homes. Whether you are replacing an old worn out seat or creating a fresh new look, installing a new seat is as simple as following a few steps without the need of a plumber.
Picking the right toilet seat
Toilet seats come in a variety of different shapes and sizes, most are generally standard (round) or elongated, although more contemporary toilets come in a square or D-shape. Although most toilets are standard sized, before buying a replacement, use a measuring tape to determine what size toilet seat will fit the bowl.
- First, find the bolts where the seat attaches to the bowl and measure the distance between them. The standard measurement is 5 1/2 inches.
- Measure the width of the bowl at its widest point.
- Measure the length of the bowl from between the seat bolts to the outer edge of the front of the bowl. Round bowls should have a length of about 16 1/2 inches and elongated bowls should be 18 to 18 1/2 inches.
Round bowls should have a length of about 16 1/2 inches and elongated bowls should be 18 to 18 1/2 inches.
Now having the correct size, you can pick from a range of colors and styles that best suit your needs and/or artistic expression. Consider the stylistic statement of a contrasting color, such as a black seat on a white color. You can also purchase a “whisper close” seat that has special pads on the bottom to prevent it from loudly slamming shut. This is a great option when considering kids.
Prepare your tools for the project
As stated earlier, removing the old toilet seat will require a few basic tools. The list of tools needed for this project are listed below:
- Flathead screwdriver
- Adjustable wrench or pliers
- Paper towels or rag (optional)
- WD-40 (optional)
- Small Hacksaw (optional)
Your new toilet seat should come with all the necessary hardware needed to be installed. Remember to follow all manufacturer’s recommendations and installation instructions.
Removing the old toilet seat
Start by locating the bolt covers located at the back of the seat, where the seat hinges. You should find one on each side of the toilet seat. Pop off the bolt covers. Note: some seats don’t have bolt covers, so this step may not apply. If your toilet seat contains bolt covers, open these covers by prying open with your finger, if necessary, use a screwdriver.
You should now have access to the bolt located underneath the cover, including the nut located underneath, at the back of the toilet holding the bolt in place. Some nuts have a shape similar to a wingnut, allowing you to hold it in place by hand. Loosen the nuts from each bolt by hand or with an adjustable wrench, turning counterclockwise. In most cases, you’ll need a standard screwdriver to hold the bolt in place when attempting to remove the nuts. Note: If you find removing the bolts challenging, try using WD-40 to loosen them or you can cut the plastic bolts using a small hacksaw.
You should now be able to remove the seat by simply lifting it off the toilet bowl. Collect the bolts, nuts, washers and any loose plastic or metal hardware that was attached to the old seat. Place them in a bag along with the old toilet seat ready for disposal.
Be sure to clean on and around the toilet bowl and the holes for the bolts, prepping the area for installation of the new toilet seat.
Installing Your New Toilet
Remove the toilet seat from the packaging. Be sure to inspect it for any damage. The new toilet seat should come with all the mounting hardware you need.
Start with placing the new toilet seat lid atop the toilet bowl rim, with the new seat hinges aligned over the holes for the bolts. Feed each bolt through the holes in each hinge and through the holes located on the toilet bowl, making sure the head of the bolt is facing upward (on top) Once the bolts are in place, attach the nuts to the threaded end of each bolt. If washers are included in your hardware, place them on the bolts before the nuts. Tighten the nuts clockwise by hand along the bolts thread until snugged then tighten with a wrench to insure a firm connection. It may be necessary to have a standard screwdriver hold the bolt in place while you secure the nut.
If the hinges have plastic covers, snap them in place. Last, open and close the lid and jiggle the seat to confirm it is secure. Congratulations you have successfully installed a toilet seat.
Investing in Peace of Mind
A thorough plumbing inspection is an investment in your peace of mind. By using the checklist and understanding the potential issues, you can make an informed decision and avoid costly surprises. Consider hiring a professional plumbing inspection service, like Option One Plumbing, to provide a comprehensive assessment of the home’s plumbing system.

